To choose a smartphone replacement part, first check the device's exact model code and revision, then the part's function, technology, and package contents. Find out whether the repair also requires calibration or a post-repair software procedure. Only then should you compare quality grades and prices. An identical appearance or a matching connector does not by itself confirm full compatibility.
What information do you need before ordering?
Give the seller more than just the model name shown on the housing. Find the full model code in the settings or on the factory markings, check the revision of the installed part, and identify the exact assembly that needs to be replaced. For models with regional or hardware variants, this helps prevent you from ordering a part that looks similar but is incompatible.
- Write down the manufacturer, full name, and model code of the smartphone.
- Keep photos of the old part's markings and connector positions.
- Clarify the assembly's purpose: for example, an earpiece or bottom speaker, or a charging-port or button flex cable.
- Check the package contents: the frame, seals, brackets, adhesive components, and small parts may be sold separately.
- Check the service manual for the specific model: Apple, Samsung, and Google document the procedures, tools, and software steps required for certain repairs.
What should you check for each type of replacement part?
Every part must match the exact model, but the other criteria differ. A display must also be selected by technology and package contents, a battery by its code and condition, a flex cable by its function and revision, and a speaker by its position and type. This table will help you collect the necessary information before payment.
| Part | What to check before ordering | What to test before final installation |
|---|
| Display | Model code, OLED/LCD technology, module grade, frame, and flex cable positions | Image, touch response across the entire surface, brightness, and related sensors |
| Battery | Battery code, compatible models, physical condition, and stated package contents | No swelling or damage, correct connection, and diagnostics |
| Flex cable | Purpose, revision, shape, and the number and positions of connectors | Operation of every function routed through the flex cable |
| Speaker | Earpiece or loudspeaker, housing shape, contacts, and seals | Volume, sound clarity, and correct seating |
How do you choose a display?
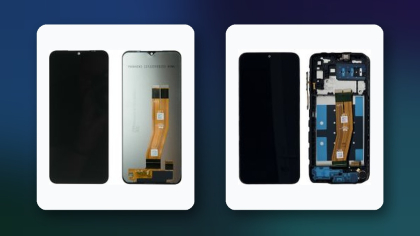
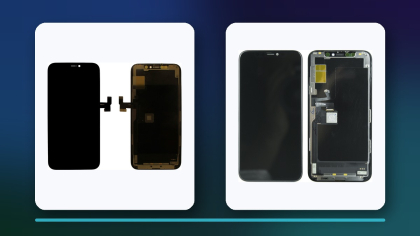
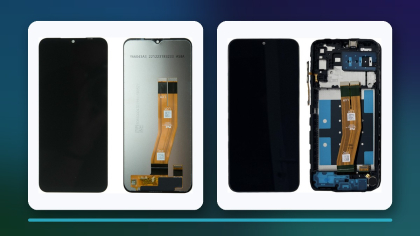
For a display, the exact model, panel technology, module grade, and package contents all matter. Terms such as Original, Service Pack, OLED, In-Cell, and Refurbished may refer to technology, origin, or condition, so they do not form a universal grading scale across suppliers. Ask for specific details: the panel's origin and condition, whether a frame is included, and which components must be transferred from the old module.
Before bonding the module in place, connect it according to the model's service procedure. Test the image against light, dark, and colored backgrounds, touch response across the entire surface, brightness adjustment, and the sensors associated with the display assembly. If the model requires calibration or a post-repair software procedure, follow the manufacturer's current service manual. For more information about commercial naming conventions, see “Display quality grades: how to choose a module”.
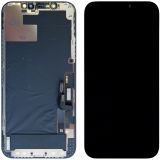 iPhone 12 / iPhone 12 Pro Display (6.1") Black OR75,00 $›
How do you choose a battery?
Select a battery by its part code and the exact smartphone model, not merely by its dimensions or mAh rating. Check whether the part is new, what is included, and whether the manufacturer requires diagnostics or a software step after replacement. Do not use a battery with swelling, dents, punctures, signs of overheating, or a damaged flex cable.
An unusually high capacity figure on the label does not by itself prove that the battery will run longer. After installation, check charging, temperature, stable operation, and any available system diagnostics. The effects of temperature and charging patterns on battery lifespan are explained in “Fast charging and battery lifespan: what you need to know”.
 iPhone 13 Battery (6.1") OR11,20 $›
How do you choose a flex cable?
The description “flex cable for this model” is not specific enough: a single smartphone has flex cables for charging, buttons, antennas, sensors, cameras, and board-to-board connections. Check the purpose, geometry, markings, number of connectors, and the components already installed on the flex cable. An identical shape does not guarantee identical routing or support for every function.
Assemblies associated with biometric functions require particular care. Do not apply interchangeability claims about buttons, sensors, or cameras from one model to another without service documentation. Before closing the housing, test every function that depends on the new flex cable.
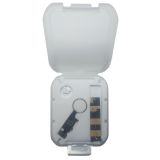 iPhone 7 / iPhone 7 Plus / iPhone 8 / iPhone 8 Plus Home Button Flex Cable White (Bluetooth)1,80 $›
How do you choose a speaker?
First identify which assembly is faulty: the earpiece speaker works during calls when the phone is held to your ear, while the bottom speaker or loudspeaker reproduces speakerphone audio, music, and alerts. Before ordering, check the module's shape, contacts, mounting points, seals, and model code. A sound problem may also be caused by the grille, a flex cable, the board, or a software setting, so diagnosis should come before purchase.
Before final assembly, test the volume and sound clarity at several levels, as well as how securely the module is seated. Distortion or low volume after replacement does not always indicate a defective new part: the cause may be a misaligned seal, a clogged grille, or a fault elsewhere in the audio path.
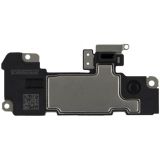 iPhone 11 Speaker2,90 $›
What should you ask the seller before payment?
Before paying, confirm the SKU and the testing and return terms in writing. Ask whether the part can be connected without final installation, which signs of installation affect return eligibility, what the package includes, and how the supplier defines its quality grade. Keep the packaging and markings until functional testing is complete.
- Does the part match the device's full code and revision?
- How does the product page describe the part's origin and condition?
- What exactly is included, and what must be transferred from the old assembly?
- Are calibration, diagnostics, or a post-repair software procedure required?
- What testing and return conditions apply before bonding the part in place or removing protective films?
What sequence of steps reduces the risk of error?
A reliable process begins with identifying the device and ends with testing before the housing is closed. Do not order a part based on a single photo, and do not perform irreversible installation before testing it. If the seller's information conflicts with the service manual, stop and clarify compatibility.
- Confirm the fault and the exact assembly that needs to be replaced.
- Check the model code, the old part's revision, and the service manual.
- Compare the description, package contents, and testing conditions of several options.
- After delivery, inspect the packaging, markings, connectors, and the part itself.
- Perform a functional test before bonding, sealing, or final assembly.
Sources
The ProductChips in this article show examples of product categories, not a universal kit. Check current compatibility, package contents, price, and availability on the specific product page before ordering.

 UA
 RO




The information below is required for social login
Sign In
Create New Account