Useful information
How to open a service center — a practical article with explanations and recommendations for technicians, service centers, and users. It highlights the main points to consider when choosing, using, or repairing devices.
A phone repair shop can start as a single bench in a rented corner or as a walk-in service centre with a front desk and several technicians. The order of decisions is the same for both. This guide walks through it step by step: what you will repair, where, with which tools and parts, how you take devices in and hand them back, and how customers will find you. It is written for technicians who want to work for themselves and for owners planning a first location.
Legal and tax rules depend on the country and the form of business you choose, so treat that section as a checklist of questions for an accountant or lawyer rather than as advice.
Step 1. Decide what you will repair
Start with the list of services, not the premises. It sets the size of the room, the tool budget and the skills you need on staff. Most new shops fall into one of three levels:
- Module repairs: screens, batteries, charging ports, back glass, cameras, speakers. Parts are swapped as whole units, and the main tools are screwdrivers, a heating plate or separator, spudgers and a good stock of parts.
- Board-level repairs: connectors, power circuits, liquid damage. You need a microscope, soldering and hot air stations, a bench power supply, a multimeter and someone with the experience to diagnose faults on the board.
- Software work: updates, reflashing and data transfer. This takes paid tools and strict rules on customer data.
Begin with what you can do reliably and add services as the team gains experience. A shop that turns down a complex board job keeps its reputation; a shop that ruins one loses a customer and pays for the device.
Step 2. Choose the location and lay out the room
For a walk-in shop, footfall and visibility matter: a ground-floor unit near a transport stop, a market or a shopping centre, with space for a sign. If most of your work comes from online orders and courier deliveries, a cheaper room away from the centre can work just as well.
Whatever the size, keep three zones apart:
- Reception: a counter where devices are checked in and returned, out of sight of open phones on the bench.
- Workshop: benches with good light, power sockets, ventilation for solder fumes and an ESD-safe work surface.
- Storage: a lockable cabinet or safe for customer devices and labelled storage for parts.
How to set up a bench itself (lighting, mats, tool placement, fume extraction) is covered in our guide on how to arrange a repair workplace.
Step 3. Buy the starter tools
Buy for the services from step 1 and expand later. A practical starter kit for module repairs and basic diagnostics:
- a precision screwdriver set with the bits used in current phones (Pentalobe, Tri-point, Phillips, Torx);
- plastic spudgers, picks, a suction cup, tweezers and a separator or heating plate for screens and back glass;
- a digital multimeter for checking continuity, voltages and batteries;
- a temperature-controlled soldering iron or station, flux, solder and wick;
- a heat-resistant, ESD-safe mat and a magnetic screw organiser;
- a USB tester to check charging current before and after a repair;
- isopropyl alcohol, lint-free wipes and a brush for cleaning.
 Screwdriver set Mechanic iTech (48 in 1)out of stock›
 Mechanic MiniTD MX digital multimeterout of stock›
Board-level work adds a stereo microscope, a hot air station, a bench power supply and an ultrasonic cleaner. These cost more than the whole starter kit, so buy them when you have the orders and the technician to justify them.
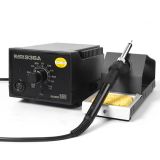 Soldering station QUICK 936A (200-480°C, 60W)53,78 $›
 Heat-resistant mat Mechanic V71 (550 x 380mm)out of stock›
Step 4. Arrange a reliable parts supply
Screens and batteries make up a large share of everyday orders, and repair time depends on how fast parts arrive. Before opening:
- pick one or two suppliers with a wide range for the models popular in your area and clear delivery times;
- understand the quality grades of screens and batteries and explain them to customers before the repair, not after;
- check each supplier's warranty and return terms for parts that turn out faulty;
- keep a small stock of the most common parts (popular screens, batteries, charging ports) and order the rest per job.
Record which part went into which device. When a part fails under warranty, you will know the batch and the supplier.
Step 5. Set up intake, records and warranty
Most disputes in a repair shop start at the counter. A clear intake process prevents them:
- Inspect the device with the customer and write down its condition: cracks, dents, missing screws, signs of liquid.
- Check what works before you open it (screen, touch, cameras, charging, Face ID or fingerprint) and note anything you could not test.
- Agree the price range and the deadline, and get approval before any extra work.
- Give the customer a receipt with an order number.
- Handle passwords and personal data according to a written policy, and never keep them longer than needed.
- Test the device again at handover and state the warranty period for the work and the part.
A paper log works for the first weeks, but repair-shop software saves time on statuses, parts stock and customer notifications. We compared the options in our article on choosing repair shop management software.
Step 6. Register the business
Requirements differ by country, so check them locally before signing a lease. Questions to settle with an accountant or the local authority:
- which business form and tax regime suit your expected turnover;
- whether you need a cash register or electronic receipts for card and cash payments;
- what your consumer law requires for repair warranties, written quotes and unclaimed devices;
- how to store customer personal data lawfully;
- how to dispose of old batteries and electronic waste;
- whether your lease and insurance cover customer property and fire risk from lithium batteries.
Open a separate business bank account from day one. It keeps the accounts clean and makes card payments easier to set up.
Step 7. Bring in the first customers
A local repair shop depends on local search. Before launch, create a business profile on Google and on the maps people use in your city, with opening hours, photos and a phone number. A simple website with a price list for popular repairs answers the most common questions before people call.
Ask satisfied customers for reviews, reply to every review, and keep your promised deadlines: in this trade word of mouth still brings in most new customers. More ideas on winning and keeping clients are in our article on how to get and keep phone repair customers.
Checklist before opening day
| Area | Ready when |
|---|
| Services | A written price list for the repairs you can do reliably |
| Premises | Separate reception, workshop and lockable storage |
| Tools | Starter kit tested; ESD mat and fume extraction on every bench |
| Parts | Supplier accounts open, stock of the most common parts, warranty terms known |
| Intake | Receipt template, condition check list, data policy, warranty terms |
| Legal | Business registered, payments and receipts set up, waste disposal arranged |
| Marketing | Map profiles, price page and a way to collect reviews |
If one row is not ready, delay the opening or limit the services you offer until it is. It costs less than fixing a dispute with your first customers.

 UA
 RO








The information below is required for social login
Sign In
Create New Account