Useful information
Accessories for the microscope: what you need to know? — a practical article with explanations and recommendations for technicians, service centers, and users. It highlights the main points to consider when choosing, using, or repairing devices.
A service microscope works as a system: the optical head, the auxiliary objective lens, the light, the stand and, if you want the image on a screen, a camera and monitor. Every accessory has to fit physically with the others without taking away the working space under the objective. This guide covers accessories and how to make them compatible. If you are still choosing the microscope itself, start with our guide to microscope types for electronics repair and how to choose one.
This article first appeared in September 2023 with a short description of the components and three products from our catalog. We updated it in October 2026: the component-by-component structure stays, each section now says what to check, and the product examples come from the current catalog.
What to check on each accessory
| Accessory | What to check | Common mistake |
|---|
| Auxiliary objective lens | Thread or mount, factor (0.5X, 2X and so on), resulting working distance | Choosing on magnification alone |
| Ring light | Mount diameter, brightness control, power supply | A mount that does not fit, or harsh glare on shiny parts |
| Camera | Trinocular port, adapter, video outputs, recording mode | Assuming the resolution is the same on every output |
| Monitor | Video input that matches the camera output, resolution, placement | Mistaking a USB power port for a video input |
| Stand | Head holder diameter, focus travel, arm length, stability | Too little room for the board and tools |
Auxiliary objective lens: working distance and field of view
This lens screws on under the microscope head and changes three things at once: total magnification, working distance and field of view. A 0.5X lens lowers magnification but increases the distance between the objective and the board and widens the area you can see. For soldering, that extra room matters, because tweezers, the soldering iron or the hot air nozzle fit in more easily. A 2X lens does the opposite: more magnification, less working distance and a narrower field of view.
Before you order, check the thread or mount diameter of your head and the microscope maker's recommendations. A 0.5X marking on its own does not guarantee that a lens fits every head. After fitting it, refocus, because the height at which the image is sharp will change.
 Mechanic MCN-0.5X Microscope Lensout of stock›
Lighting: even light without glare
A ring light clamps around the objective and lights the work area evenly, without shadows. On glossy screens, solder and metal board shields, though, it can create reflections that hide detail. Fine brightness control, a secure mount and, on some models, polarising filters that cut glare all help.
Check the inner diameter of the ring against your objective (with the auxiliary lens fitted, if you use one), the power supply type and where the brightness control sits, so you can reach it without moving the microscope. If you use a camera to document repairs, colour rendering matters too, but judge it by the actual image rather than the figures in the listing.
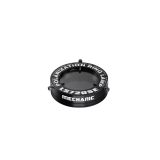 Mechanic LS720 SE microscope light16,00 $›
Camera and monitor: the video chain
You need a camera when you want the image on a screen, before and after photos of a repair, or a way to show a customer the fault. On a trinocular microscope, the camera mounts on the third port through an adapter. Start with the mechanical and optical side: the port type, the adapter and its factor. A mismatched adapter gives you dark corners or a field much smaller than what you see through the eyepieces.
Then check the outputs. The same camera can deliver different resolutions and frame rates over HDMI, over USB and when recording to a card, so look at the figures for the mode you will actually use. When you work with your hands while watching the screen, low image lag matters more than the megapixel count.
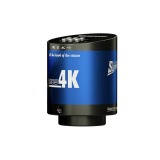 Mechanic MOS-4K microscope camera (HDMI / 4K 2160P / 30FPS / 7X ZOOM)130,56 $›
Pick the monitor to match the camera output. Its HDMI, VGA or AV input has to accept the signal the camera sends. A USB port on a monitor may only be for power or firmware updates, not for displaying video. Think about where the screen goes as well: at eye level and close to the microscope, so you are not turning your head with every move. A screen does not replace the stereo view through the eyepieces, which is where you get depth during fine soldering.
Stand and base
The stand decides how steady the image stays and how much room you have for the board, holder and tools. Check the diameter of the holder that takes the optical head, the length and height of the arm, the focus travel and the size of the base. A long or swivelling arm lets you swing the microscope aside and work on a large surface, but it needs a heavy base or a solid desk mount, and joints without play.
Remember the total weight: the head, auxiliary lens, ring light and camera all add up. If the image shakes when you touch the bench, or the head slowly creeps down on its own, the stand is overloaded or the joints have worked loose.
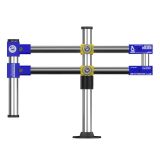 Tripod / Base for Mechanic LM3 Microscope (with double bracket)71,31 $›
Fume extraction and the rest of the bench kit are covered separately in our article on handy devices for a repair bench.
How to assemble and test the setup
- Write down the exact model of the optical head, the thread or mount diameter for the objective lens and the type of trinocular port.
- Choose the auxiliary lens for the working distance you need when soldering, then check that the ring light fits over it.
- Make sure the stand can carry the whole assembly and still leaves room for the board and tools.
- For the camera, match the adapter to the trinocular port, then the camera's video output to the monitor input.
- Test on a real board: focus at minimum and maximum magnification, check that the image stays sharp across the whole area and that you can see detail without strong glare.
- Do a test joint with the iron or hot air under the objective. If the tools touch the lens or the light, you need more working distance.
When the monitor image lags behind your hand movements, try a different camera output or mode before replacing hardware. For soldering stations that suit work under a microscope, see our comparison of professional soldering stations.
In short
Choose microscope accessories as a set, not one at a time. The auxiliary lens sets your working space, the light has to fit over it, the stand has to carry the whole assembly, and the camera and monitor need matching outputs and inputs. Check mounts and formats before you order, then test the setup on a real board.

 UA
 RO





The information below is required for social login
Sign In
Create New Account